
Furniture refinishing and lacquer painting are not just about restoring the aesthetic appeal of a piece; they are about preserving history, maintaining structural integrity, and ensuring longevity. At Finish Pros, we take pride in our meticulous process that transforms aged, worn-out furniture into stunning, functional art pieces. This blog will guide you through our detailed process, from the initial removal of hardware to the final application of clear coats, using a unique example: an early 20th-century corner cabinet.
Removal of Hardware and Initial Challenges
The first step in our furniture refinishing process involves the careful removal of doors and hardware. What may appear to be a simple task quickly becomes complicated. For instance, when working on the early 20th-century corner cabinet intended to display expensive bourbons at The Carolina Inn in Chapel Hill, we encountered several challenges. Many of the flathead miniature screws fastening the hinges to the curved glass cabinet door were broken. Additionally, lighting tracks had been installed in the cabinet over the last 40 years, and modifications, including upholstered interiors from the last 20 years, concealed many fasteners.
Carefully removing damaged screws required precision, especially around the delicate tapered curved glass door. Some screws were easily removed, while others needed to be drilled out and the screw posts extracted using small channel-locking pliers. The main upper door was then removed, followed by the 1/4 round molding holding the glass in place. The century-old glass had settled in the piece, necessitating careful, pressure-free removal.

Chemical Stripping of the Old Finish
Next, the cabinet pieces were moved to the chemical stripping area of our shop. I geared up with protective chemical sleeves, a heavy-duty apron, eye protection, a respirator, and gloves. The cabinet was placed in our flow-over stripping tray, and I activated the air-assisted pump. The chemical stripper began to flow through a tube connected to a nylon brush head. As I worked the brush head over the cabinet’s surface, the dark finish washed away, revealing the natural golden tones of the wood.
The stripped pieces were then carefully dried, with compressed air used to blow out any fluid buildup in joints to prevent drip marks. After checking for any missed areas, the stripped areas were neutralized and wiped with acetone. At this stage, the cabinet retained its patina but lacked any sheen.
Making Needed Repairs
Once the old finish was removed, the repair process began. Although not all items require repairs, most do. The early 20th-century corner cabinet needed several repairs, including structural gluing of the frame. Furniture repair and regluing are critical steps that must be completed before any sanding or further refinishing. The repairs ensure the structural integrity of the piece, preparing it for the next stages.

Hand Sanding
Sanding is a crucial step in the refinishing process, providing a perfect foundation for staining. We began sanding the cabinet with 150 grit paper, applying medium pressure and working with the grain. Areas with stubborn old finishes were tackled with more aggressive 120 grit sandpaper before being smoothed with 150 grit. The pencil method, where a graphite mark is sanded away to gauge the right amount of sanding, ensures we avoid over-sanding, a common mistake among amateur refinishers.
After the initial sanding, the cabinet was sanded again with 180 grit and then 220 grit paper. Each sanding step was followed by thorough dust removal, ensuring a clean surface for the next stage. Unlike sanding practices of the past, we use the best sandpaper products and equipment, including Festool sanders with HEPA filtration, which keeps our workspace virtually dust-free.
Choosing the Stain
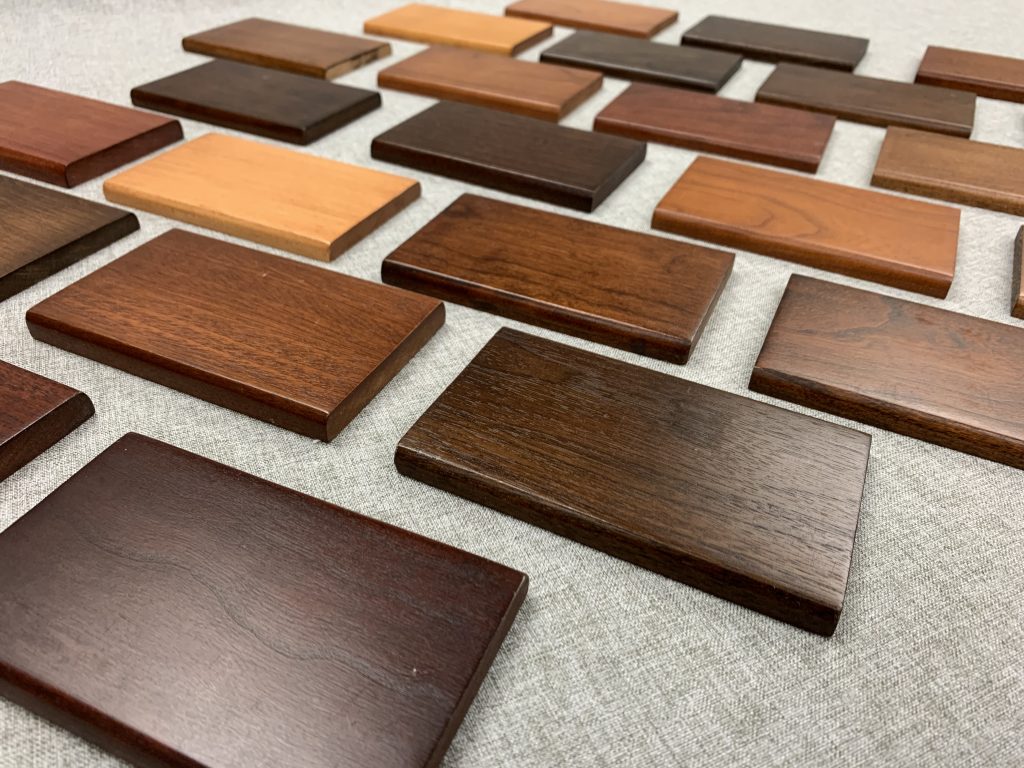
For this particular project, we opted not to use a stain, allowing the natural beauty of the wood to shine through. However, in projects that require staining, choosing the right color is a meticulous process. Our team tests multiple stains on a hidden area of the furniture to ensure the final color matches the client’s vision. Factors such as wood type, grain pattern, and original finish influence the stain selection process.
The Finishing Process: Sealers and Clear Coats
With the cabinet stripped, repaired, and sanded, it was time to move it to our spray room. Although we did not use a stain for this project, the finishing process began with the application of a sanding sealer. Our air-assisted pump sprayers applied the first coat of nitrocellulose-based sanding sealer, which effectively sealed the wood pores. The sealer, containing a higher concentration of solids, fills the grain of the wood, creating a smooth surface.
After the first coat of sealer dried, it was sanded with 220 grit sanding sponges. We typically apply two coats of sealer, sanding between each coat, before moving on to the clear coats. The final step in the finishing process involved applying three coats of clear catalyzed lacquer. This was done by squeezing the trigger of our spray gun and carefully following the cabinet’s frame, ensuring overlapping layers for a flawless finish. Each coat was sanded and cleaned before the next application, resulting in a beautifully finished piece.
Lacquer Painting
Lacquer painting follows nearly the same steps as furniture refinishing, with the primary difference being the absence of stain application. Once an item has had the old finish removed, repairs made, and the multi-step sanding process has taken place, the item is moved into the finishing department where the sealer coats are applied. In this instance, the sealer is pigmented, usually in the same or a similar tone to the final painted lacquer. Once multiple coats of the tinted sealer are applied, the final coats of the painted lacquer are applied in multiple layers. The final finish can be applied in a variety of sheens; however, dull rub, satin, and semi-gloss are the most popular selections providing a finish that enhances the piece’s aesthetic appeal.
Case Study: Second Generation Dining Table
One of our most memorable projects involved a second-generation dining table with a badly worn finish on the top and chipped edges. The double pedestal legs needed to be reglued, and a few metal lion paw foot caps were missing. We started by removing the pedestal legs from the table top. To prevent further damage to the veneer top, our team chose to glue and secure the loose veneer before stripping. Once the old finish was removed, the beautiful walnut grain was revealed, but there was still a lot of work ahead.
We used period-matching veneer from the 1930s to patch the damaged areas, while other spots were filled with epoxy. The multi-step sanding process began with 120 grit sandpaper, followed by cleaning and then 150 grit sandpaper. Nearly all the compression marks were removed through sanding, but a few stubborn spots required expert steaming to lift and conceal the damaged markings.
The pedestal legs were a hot mess, with the original glue turned to dust and only a few screws and dowels holding them together. We dismantled, cleaned, and reglued the pieces. To strengthen the bond, we scored each side of the smooth wood before gluing, ensuring the legs would be strong for future generations. A custom tinted stain was applied, followed by our multi-step finishing process, including grain filler.
Case Study: Chest of Drawers
Another fascinating project was a chest of drawers purchased locally on Facebook. The original owner explained that it had been part of his childhood set from the 1960s, made of solid maple by Ethan Allen. The new owner hired Finish Pros to refinish the piece in a painted lacquer finish. We stripped away the old finish, sanded it in a multi-step process, and applied several coats of sanding sealer followed by painted lacquer topcoats in a satin sheen finish. The chest looked gorgeous as a painted item, but best of all, the painted lacquer can be removed in the future, allowing the piece to be finished with a wood stain if the owner ever chooses to do so.
Upholstery
With the refinishing completed, the cabinet’s upper section was moved to our upholstery studio. The interior material was carefully measured, cut, and applied. New interior components for the lower level were crafted in our woodshop, providing the upholsterer with a clean slate. The final assembly included installing the hinges, cabinet doors, curved glass, and new locks. Given the original screws’ poor condition, new screws were used to ensure stability and durability.
Delivery and Installation
Once the refinishing and upholstery were completed, the cabinet was delivered and installed at the Carolina Inn in Chapel Hill. The facility team installed new LED lighting, enhancing the cabinet’s display capabilities. We encourage you to visit the Carolina Inn, admire the craftsmanship, and enjoy a glass of the fine bourbons prominently displayed in this beautifully restored cabinet.

The art of furniture refinishing and lacquer painting at Finish Pros involves meticulous attention to detail, from the initial removal of hardware to the final clear coat application. Our process ensures that each piece retains its historical value while achieving a renewed aesthetic appeal. Whether you have a cherished family heirloom or a valuable antique that needs restoration, our expert team is dedicated to delivering exceptional results.
By choosing Finish Pros, you are not only preserving the beauty and functionality of your furniture but also supporting local craftsmanship. Contact us today to discuss your furniture refinishing and lacquer painting needs. Let us bring your treasured pieces back to life with our expert touch.
Engagement Question
Have you ever had a piece of furniture restored or refinished? We’d love to hear your stories and see your before-and-after photos! Share your experiences with us in the comments below or contact us to start your own restoration journey.